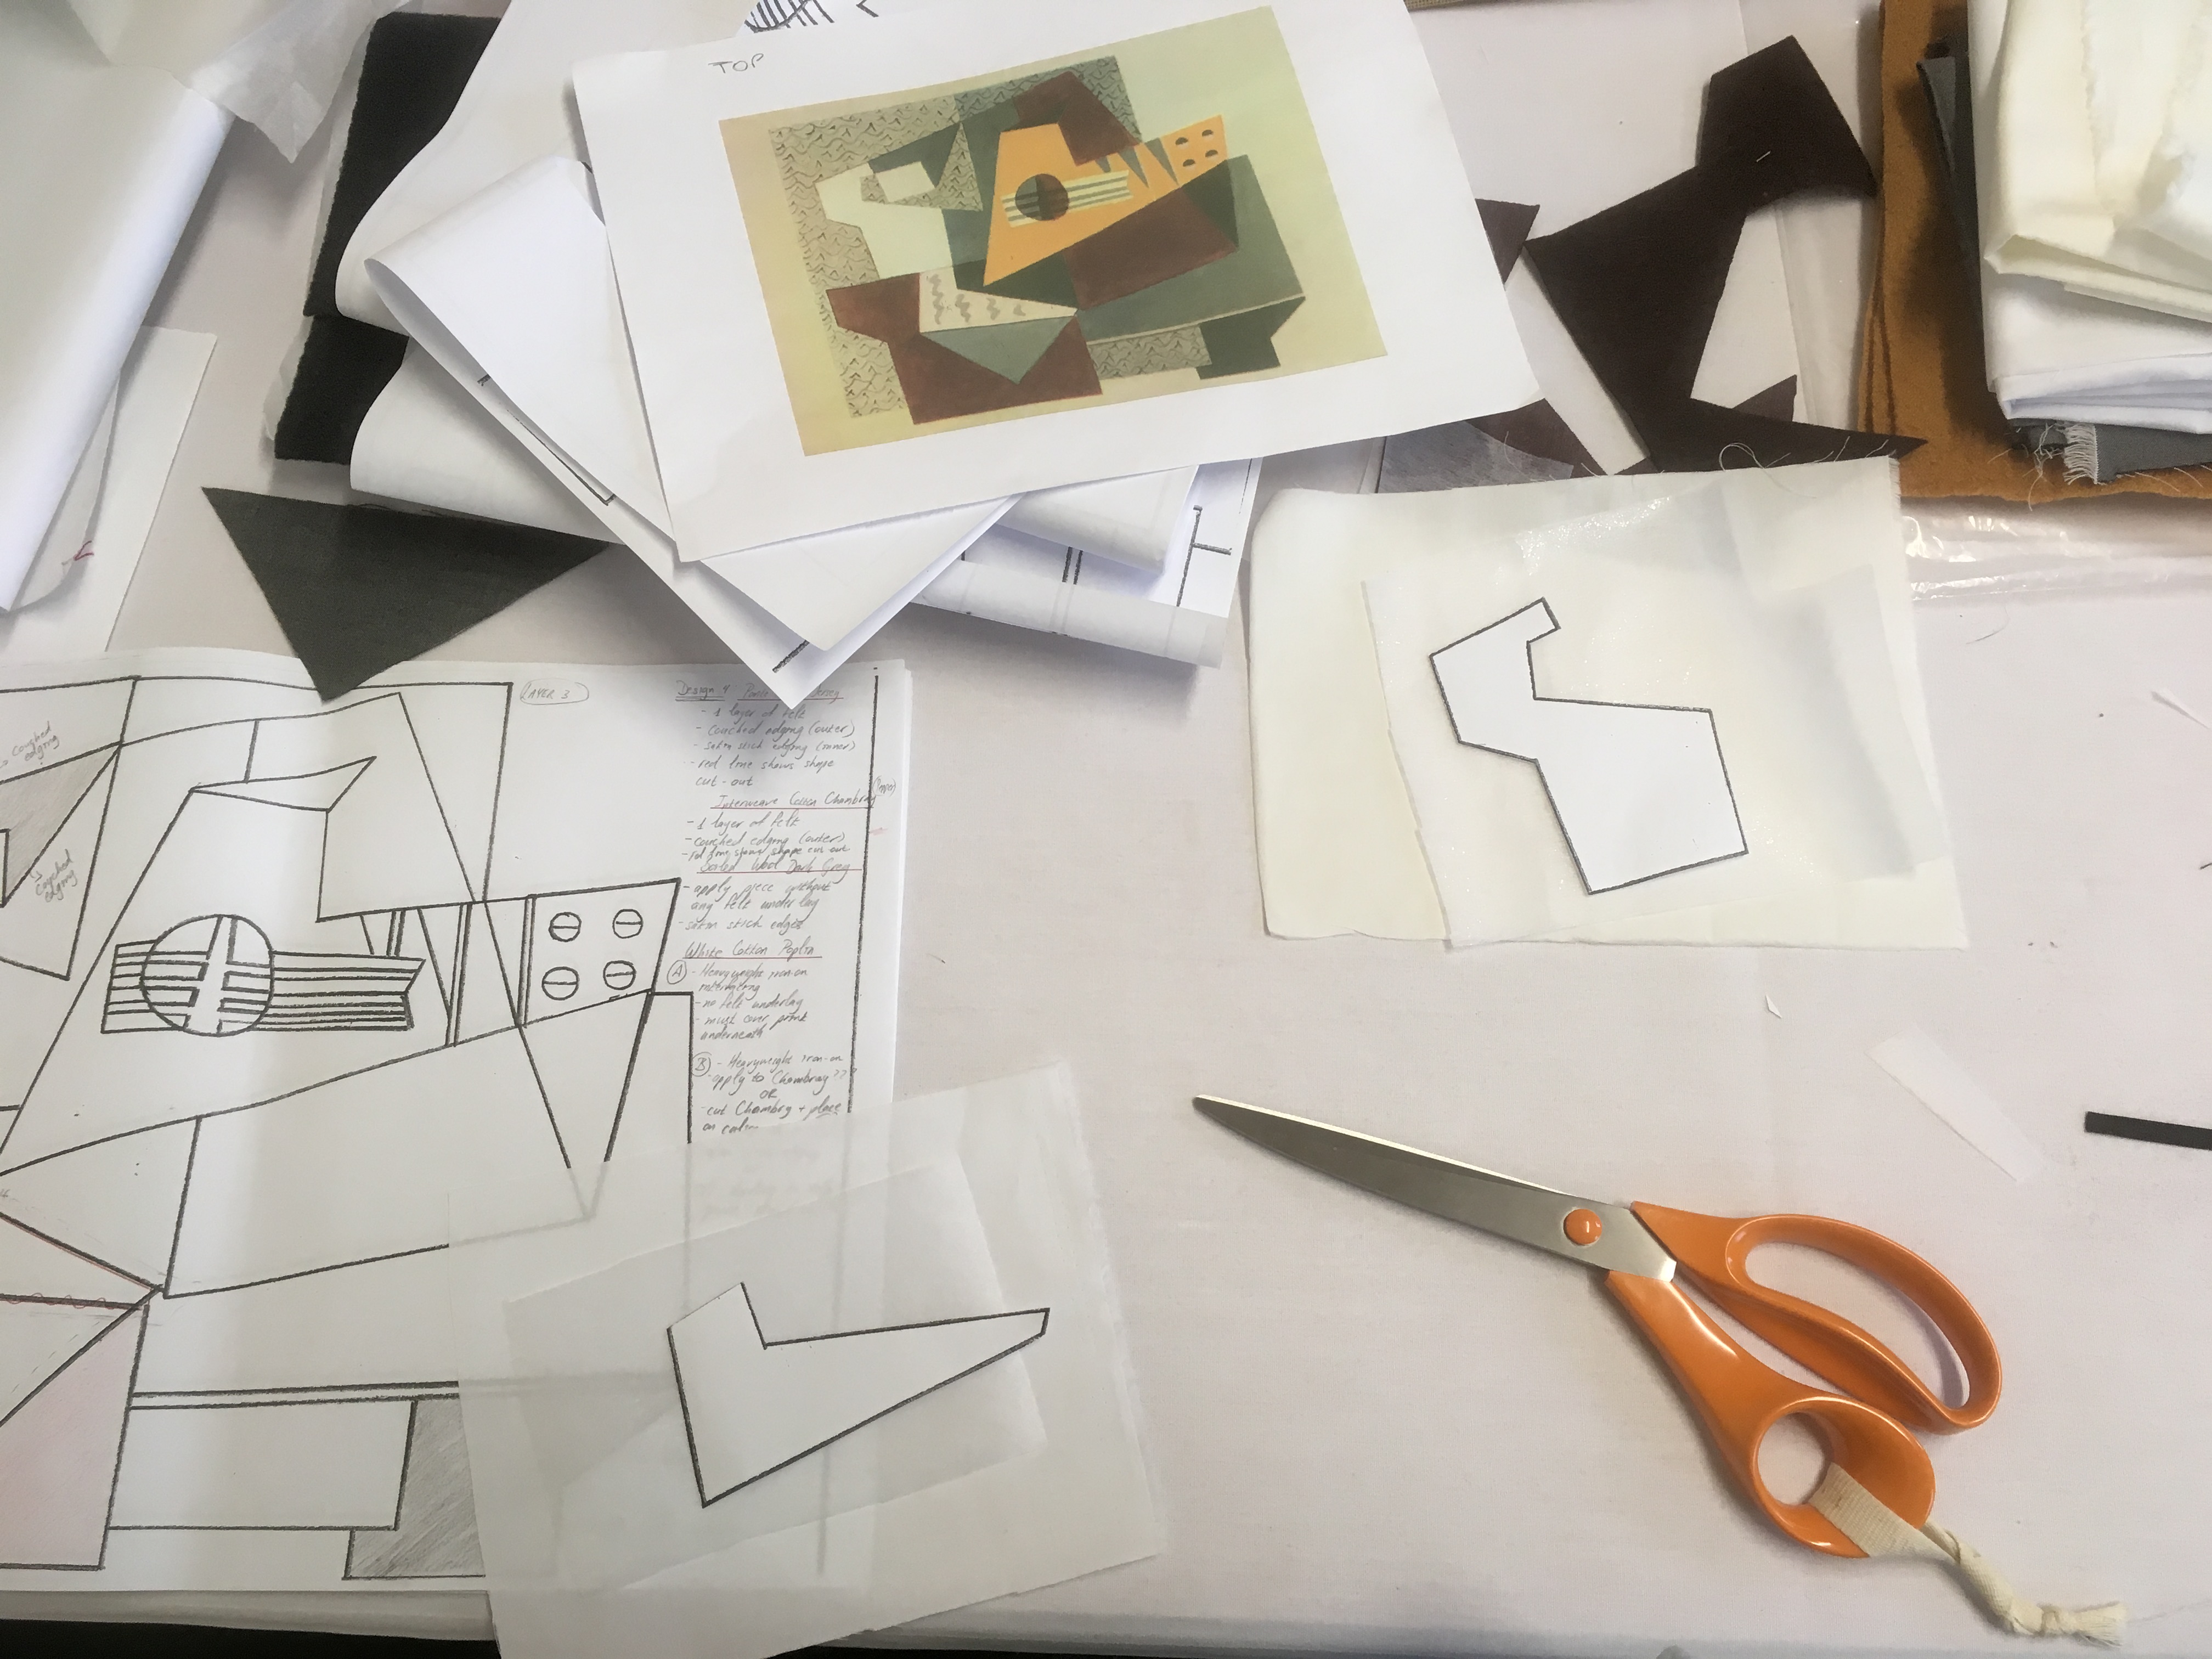
I should have perhaps began my blog with this article rather than starting in medias res of my Appliqué work, that being said, back in the summer of 2015 I completed the first of four modules which the Royal School of Needlework require in order to achieve their Certificate in Technical Hand Embroidery. During my certificate modules, I was not really in the habit of taking pictures whilst producing my pieces, so I can really only display the finished pieces of my certificate work.
I can’t state enough the pleasure it has been learning at the Royal School of Needlework (R.S.N.). The tutors have all been excellent and this institution has been steadfast in maintaining and promoting their excellent standard of embroidery techniques. I highly recommend either taking a day class, or embarking on one of their qualifications, whether at Hampton Court, one of their satellite schools, or on-line.
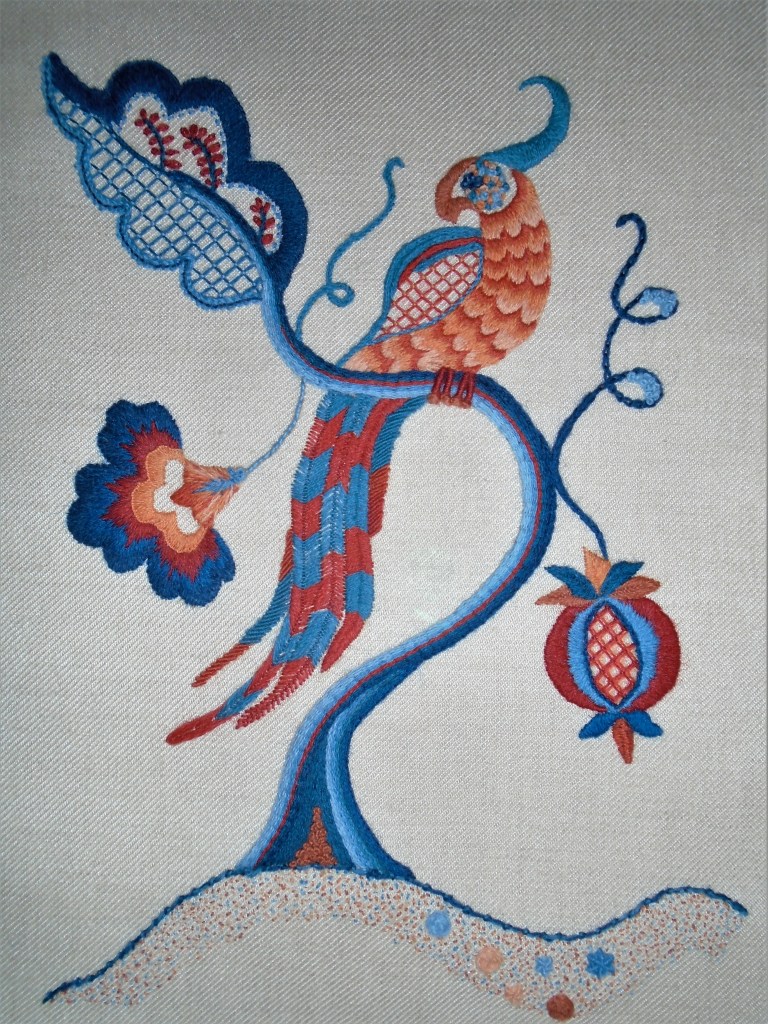
The first module one completes during the certificate programme is a module on Jacobean Crewelwork. Jacobean embroidery was a style of surface embroidery developed during the first quarter of the seventeenth century under the reign of King James I of England. As a crewel embroidery, it traditionally uses crewel wool and is worked on linen. Students of this module produce a design around a tree of life and can incorporate an animal or insect as well as some sort of foliage. These are normally based on the stylised motifs typical of the Jacobean era, influenced by the motifs that were found on Indian chintzes. The colour palette is also limited and during the planning of the piece, a number of different stitches are used. Below is a picture of my finished piece.
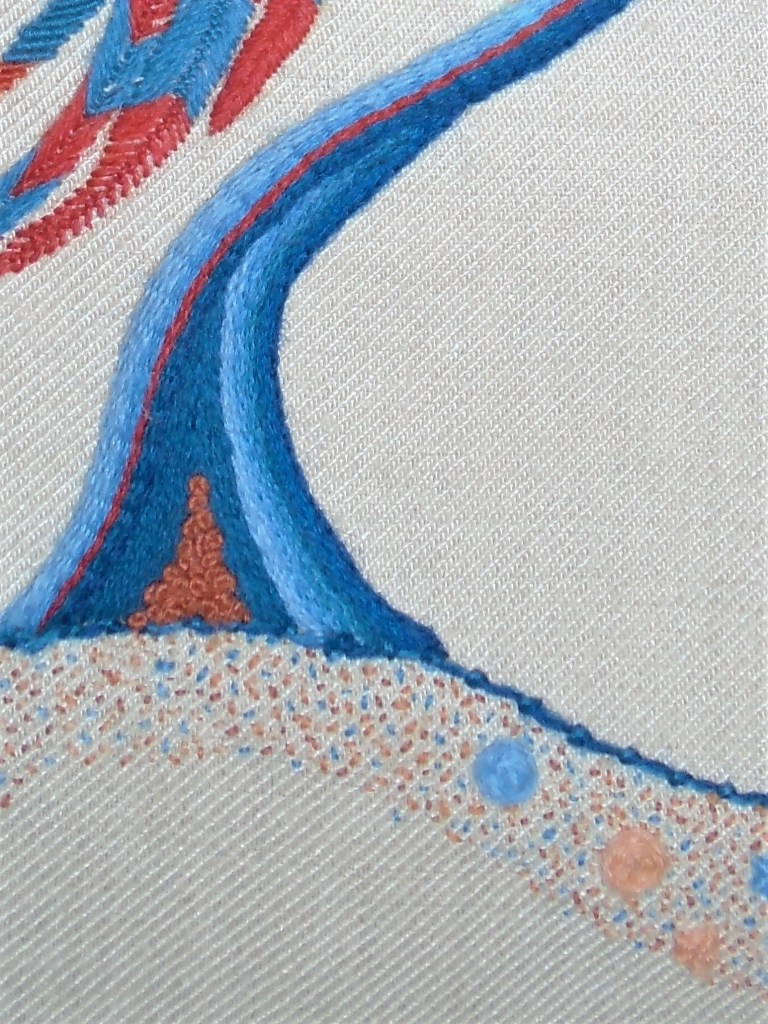
Breaking the design down into sections, the image on the left shows the bottom of the tree of life, which is the first element completed in the design. It is made up of raised stem stitch (which I found quite difficult to do) and the triangular aperture is filled with French knots. The image on the right shows the leaf at the tip of the tree of life. It incorporates trellis stitching on the bottom with a contour in a Pekinese stitch. This stitch is formed of a base stitch (back stitch if I remember correctly) and then another thread is laced through the back stitches, going forward two stiches and back one in order to form a series of loops. It is also referred to as the blind stitch as the embroiderers who incorporated this stitch in the clothing of Han Emperors sometimes went blind after spending countless hours creating this delicate surface embroidery. The top half of the leaf contains three veins of stem stitching embellished with granito stitches and the upper contour is done in a button-hole stitch.
Tree of life 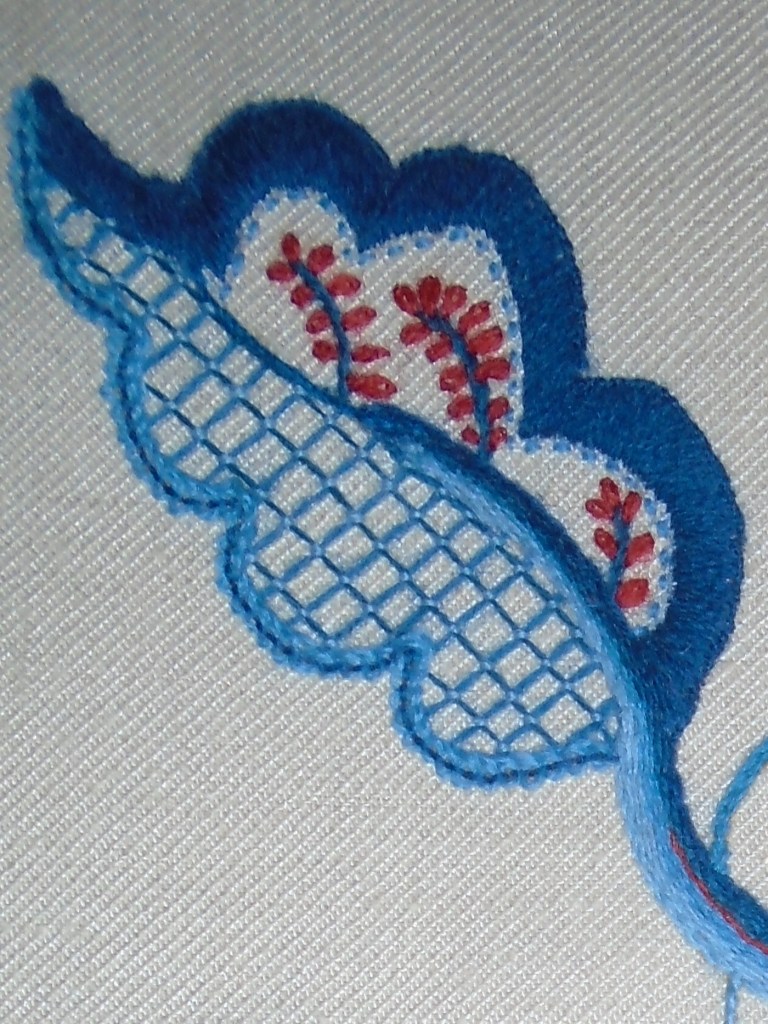
Leaf
I then worked the pomegranate (image on the left, below). The centre contains trellising surrounded by split stitching. The outer area represents my first attempt at the long and short stitch. It isn’t quite even, and even today I find this a difficult stitch to master completely. The small leaves at the top and bottom of the fruit are in fly, Cretan and Van Dyke stitches. The Cretan stitch was the most difficult to do, and I still can’t do it well. It’s one of those stitches that I need to sit down and practise relentlessly, but it did give me night terrors trying to attempt it here. The vine is done in a chain stitch. The flower on the right was a much better attempt of the long and short stitch. A contour of split stitching is done first in order to produce a sharp, clean edge. Then, a row of long and short stitching is made, coming up from within the design and over the split stitching. Once this row established, the following rows are done coming up from first row (splitting the stitches as you continue) and then down in the design. The light orange section within the flower is done in a button hole stitch.
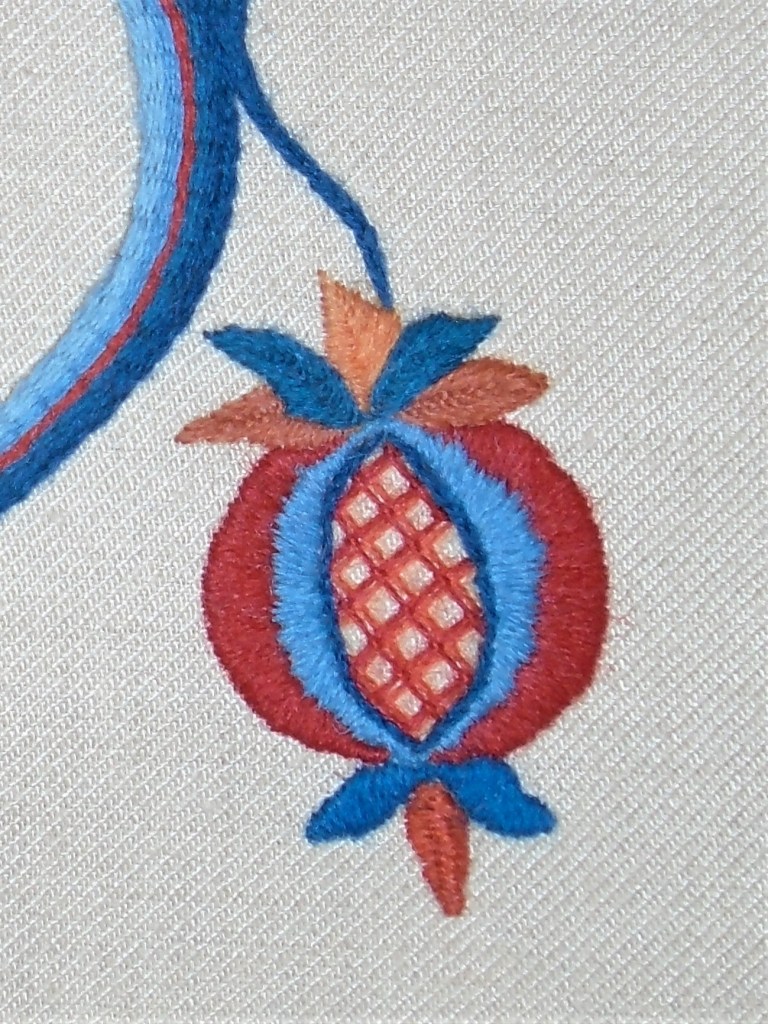
Pomegranate 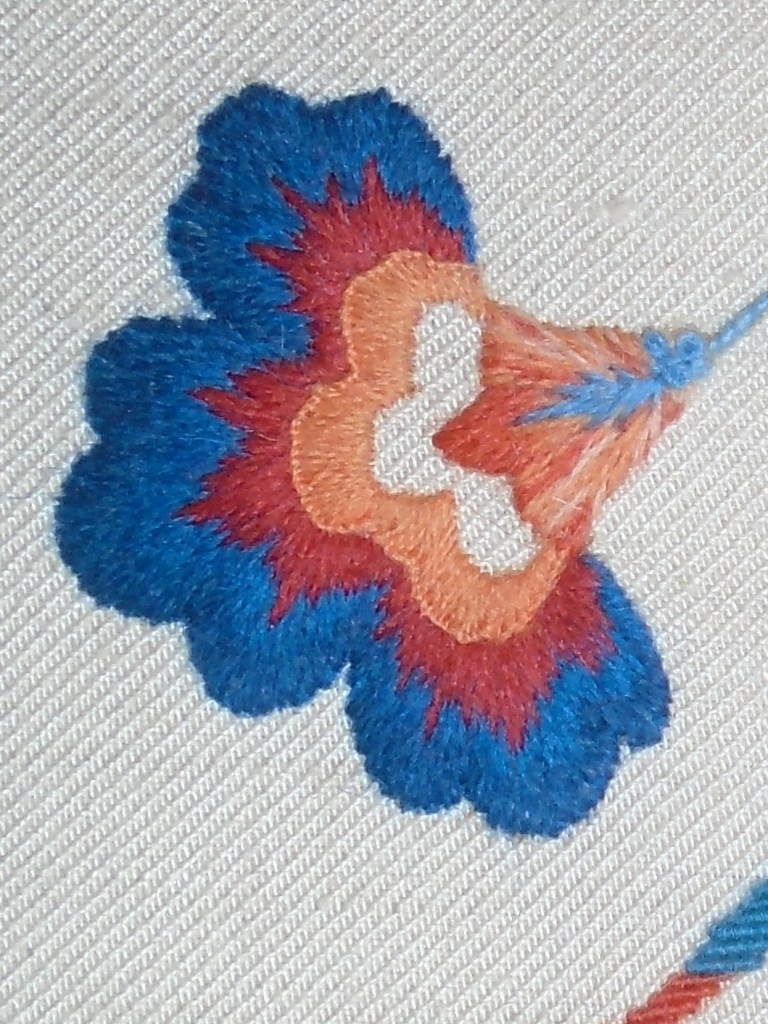
Flower
The crest and the beak of the bird below is done in a padded satin stitch whilst French knots form the eye and details of its face. I think I did a good job at the long and short stitch in the bird’s breast whilst the wing also is an even shape of trellis surrounded by rows of chain stitching. Bullion knots and French knots make up the claws and they too sit nicely on the tree. I was less happy with the tail feathers done in bullion knots for the outer feathers (which I think look to heavy on the bird) and the middle feather done in a fly stitch. Fly stitching can be tricky too as the more of it you do in a shape, it starts to misbehave, taking on proportions which you don’t want. I had to unpick them several times and again, this is definitely a stitch I need to practise more. The various vines are made using a chain stitch (at times whipped) and decorated with French knots (I began to really enjoy making them). At the ground level, I constructed the hillock using a coral stitch and below lots of seeding (which I found very relaxing to do). There are some decorative elements here as well in the form of whipped and woven wheels.
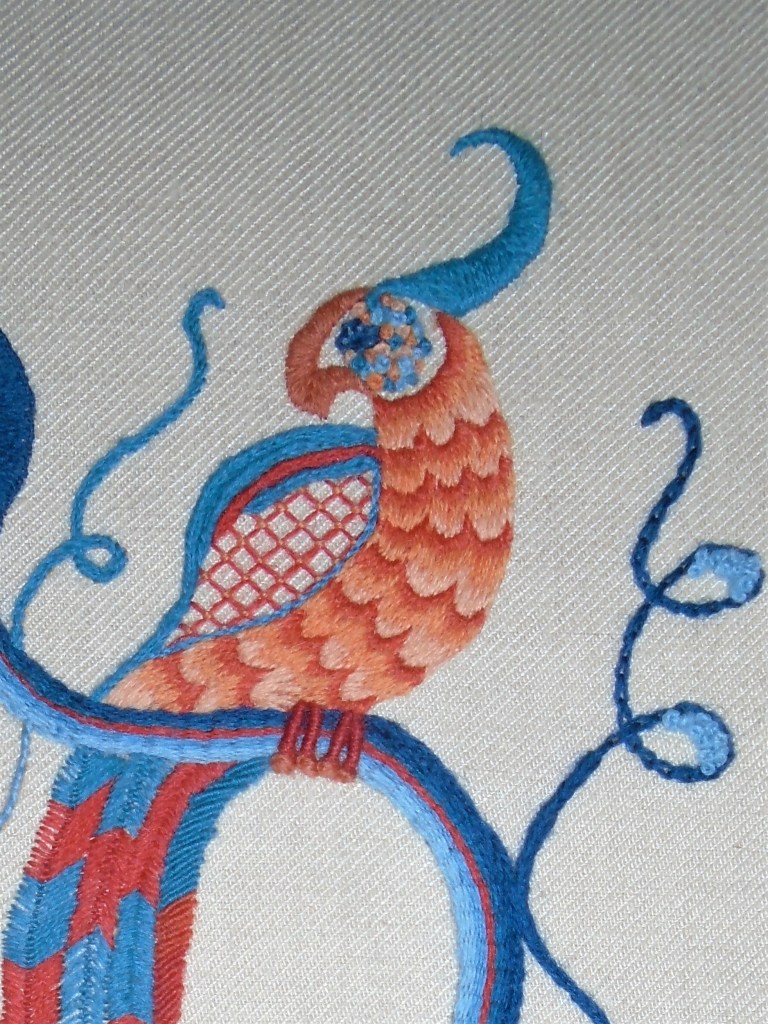
Bird 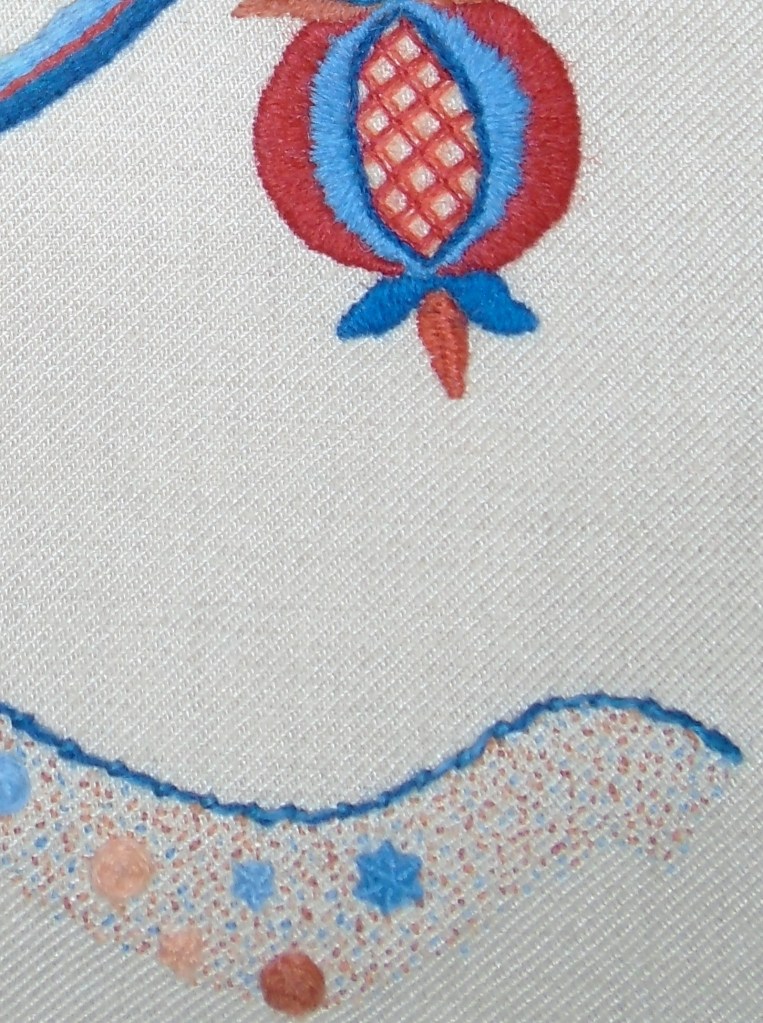
Ground
Jacobean embroidery is a delightful embroidery to work and since this module I have produced two other pieces which I will share at a later date!
